Part 2 – A Basic Sine Wave
This is article 2 in our multi-part series on developing a custom shader for Unity. In this article we will be modifying our shader to create a basic sine wave that moves along the surface of our 3D model.
While the default ShaderLab file we created in Part 1 comes with a surface shader (also known as a fragment or pixel shader) function built in, what we need is a vertex shader. A vertex shader allows us to operate on the actual vertex positions and normals of the model instead of just the colors. To do that, first we need to tell Unity that we have a vertex shader. Modify this line:
#pragma surface surf Standard fullforwardshadow
to
#pragma surface surf Standard fullforwardshadow addshadow vertex:vert
addshadow needs to be added in whenever you plan to modify vertex positions so that Unity makes a shadow caster pass on the object. Otherwise the shadows on your model will be generated based on the model’s original shape.
vertex: tells Unity that we’re going to be creating a vertex shader and vert tells Unity the name of the function where we’ll be doing that. So next let’s add that function. Right above our surface function, add the following:
void vert (inout appdata_base v) {
}
appdata_base is a part of another collection of structures provided by Unity. This structure determines what data will be available to use while modifying the vertex. appdata_base contains the following fields:
| Field Name | Variable Type | Note |
|---|---|---|
| vertex | float4 | Vertex position in local space. |
| normal | float3 | Normal for this vertex. |
| texcoord | float4 | UV coordinate for this vertex. |
Now that all that setup is out of the way, let’s actually make something happen. Inside our vert function, add the following line:
v.vertex.xyz += v.normal * sin(_Time.y);
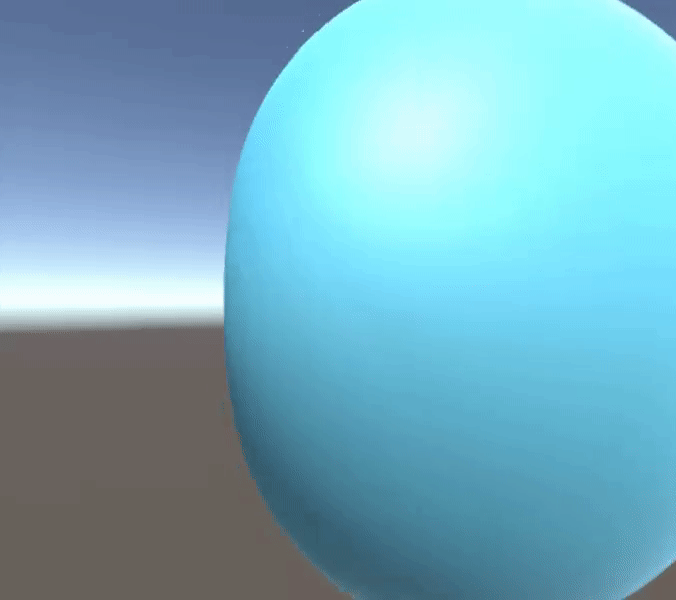
Fire up Unity and you should see a sphere growing and shrinking in size. It’s not much, but it’s the start of our jelly shader. Let’s breakdown what’s happening.
Because v is specified as inout any modifications we make to the vertex will persist to the other stages of the shader. We’re then modifying our vertex’s position, v.vertex.xyz, by moving it along the axis of its normal, v.normal. This creates our breathing motion. How far along we move on that axis is determined by multiplying by our sine function, which we’re feeding a time variable.
_Time
_Time is yet another Unity convenience built-in to save us time. _Time is a vector4 prefilled with the following values:
Variable Value _Time.x CurrentTime / 20 _Time.y CurrentTime _Time.w CurrentTime*3 _Time.z CurrentTime*2
Just using a plain time variable for our sine wave means our modification is uniform across the entire model. Let’s change that. Define the following variables just below our “_Glossiness”, “_Metallic”, and “_Color” variables:
static half _Frequency = 10;

static half _Amplitude = 0.1;
For now, ignore the fact that we’ve marked these variables as static. This allows us to assign values on declaration, which is handy, but we will change this later on. Let’s rework our vertex function. First, instead of affecting all vertices the same, let’s have our sine function take into account x position of the vertice:
v.vertex.xyz += v.normal * sin(v.vertex.x + _Time.y);
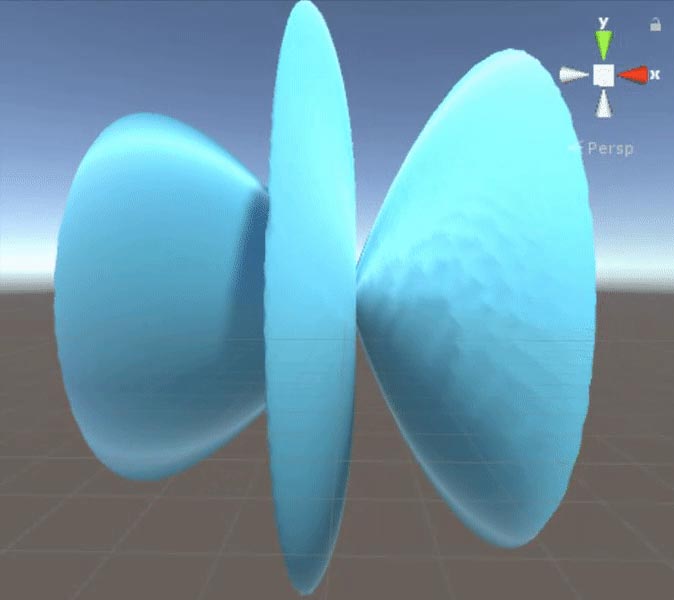
At this point our sphere is doing something, but it still doesn’t look like a wave. Let’s try adjusting the frequency of the waves on our sphere:
v.vertex.xyz += v.normal * sin(v.vertex.x * _Frequency + _Time.y);
Closer, but the waves are a little intense, let’s knock down the amplitude a bit.
v.vertex.xyz += v.normal * sin(v.vertex.x * _Frequency + _Time.y) * _Amplitude;
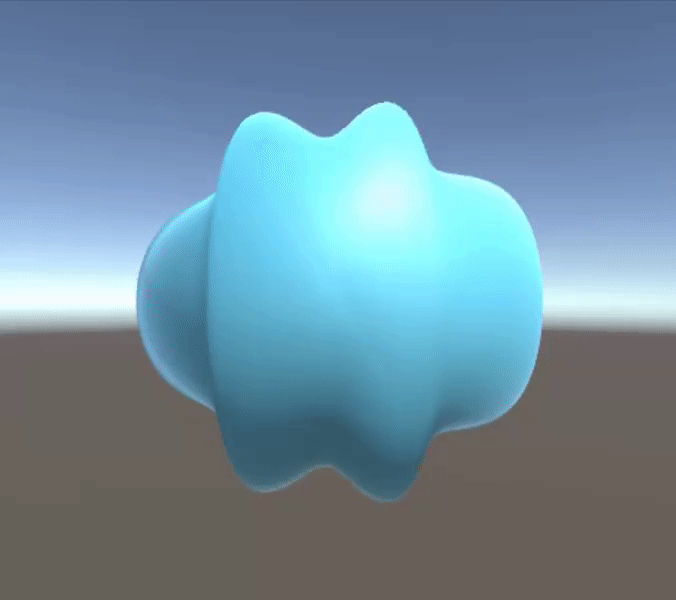
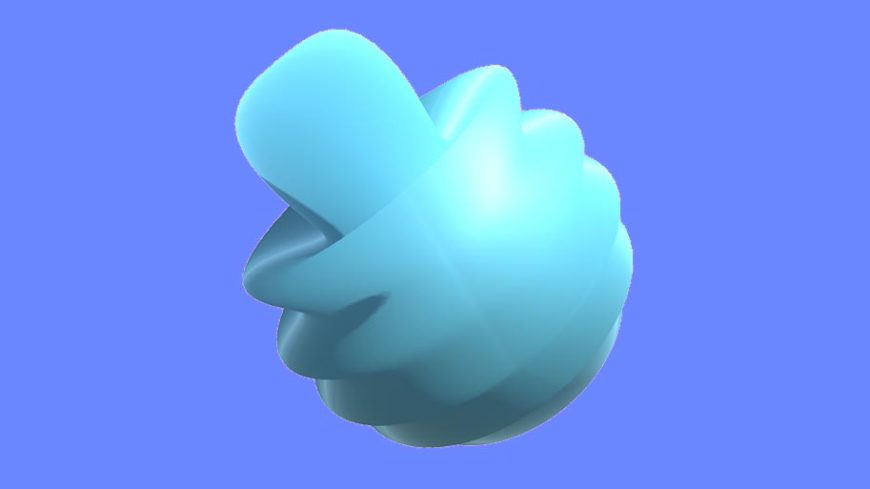
Alright! Now those look like waves. We now have waves on our model moving along the x-axis (thanks to the >v.vertex.x being inside our sin function) with configurable parameters. At this point, I really encourage you to take a few minutes to play with vertex function and see what other cool effects you can create just by modifying _Frequency, _Amplitude, _Time, and even v.vertex. Here’s our full shader code currently so you can copy and paste it back in when you’re done experimenting.
Shader "Custom/JellyShader" {

Properties {

_Color ("Color", Color) = (1,1,1,1)

_MainTex ("Albedo (RGB)", 2D) = "white" {}

_Glossiness ("Smoothness", Range(0,1)) = 0.5

_Metallic ("Metallic", Range(0,1)) = 0.0

}

SubShader {

Tags { "RenderType"="Opaque" }

LOD 200
CGPROGRAM

// Physically based Standard lighting model, and enable shadows on all light types

#pragma surface surf Standard fullforwardshadows addshadow vertex:vert
// Use shader model 3.0 target, to get nicer looking lighting

#pragma target 3.0
sampler2D _MainTex;
struct Input {

float2 uv_MainTex;

};
half _Glossiness;

half _Metallic;

fixed4 _Color;

static half _Frequency = 10;

static half _Amplitude = 0.1;
// Add instancing support for this shader. You need to check 'Enable Instancing' on materials that use the shader.

// See https://docs.unity3d.com/Manual/GPUInstancing.html for more information about instancing.

// #pragma instancing_options assumeuniformscaling

UNITY_INSTANCING_CBUFFER_START(Props)

// put more per-instance properties here

UNITY_INSTANCING_CBUFFER_END
void vert (inout appdata_base v) {

v.vertex.xyz += v.normal * sin(v.vertex.x * _Frequency + _Time.y) * _Amplitude;

}
void surf (Input IN, inout SurfaceOutputStandard o) {

// Albedo comes from a texture tinted by color

fixed4 c = tex2D (_MainTex, IN.uv_MainTex) * _Color;

o.Albedo = c.rgb;

// Metallic and smoothness come from slider variables

o.Metallic = _Metallic;

o.Smoothness = _Glossiness;

o.Alpha = c.a;

}

ENDCG

}

FallBack "Diffuse"

}