Part 6 – Omni-directional Movement Axis
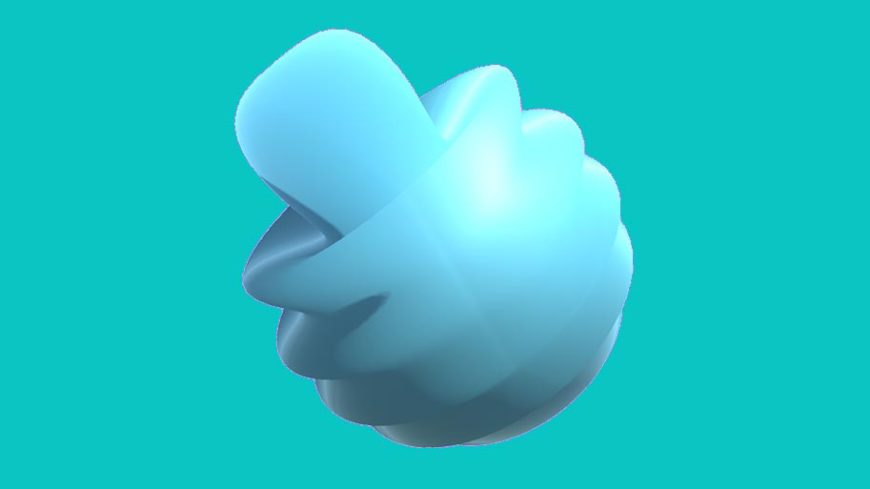
This is article 6 in our multi-part series on developing a custom shader for Unity 3D. In this article we will add even more life to our sine wave by giving it a more dynamic movement axis.
Currently, our waves only move along the x-axis. While we could make this work inside Unity using rotations, the better and more robust solution is to allow the shader to handle any potential axis. To do that, we’ll need to use a little trigonometry-magic.
First we need to provide our shader with some more information. Let’s pass along the location in world space where our mouse click collided with the model and the location in world space of the model’s center. Add the following lines right after we set controlTime to zero.
modelRenderer.material.SetVector("_ModelOrigin", transform.position);

modelRenderer.material.SetVector("_ImpactOrigin", hit.point);
This time, instead of using SetFloat we’re using SetVector because we’re passing along the a 3 dimensional vector and not a float. It should be noted _ModelOrigin and _ImpactOrigin don’t actually exist yet in our shader, let’s fix that. As usual, define the shader variables in the standard way; once in the properties section and once inside the sub shader.
Properties {

...
_ModelOrigin("Model Origin", Vector) = (0,0,0,0)

_ImpactOrigin("Impact Origin", Vector) = (-5,0,0,0)
...

}
SubShader {

...
float4 _ModelOrigin;

float4 _ImpactOrigin;
...

}
Great! Now we have access to the model’s position and the impact position. Next, let’s create a new float4 vector called direction that represent the direction our wave will travel across the model. Add this line near the top of the vert function.
void vert (inout appdata_base v) {

float4 world_space_vertex = mul(unity_ObjectToWorld, v.vertex);
float4 direction = normalize(_ModelOrigin - _ImpactOrigin);                 //New Line

float4 origin = float4(1.0 - _ControlTime * _ImpactSpeed, 0.0, 0.0, 0.0);
    ...

}
_ModelOrigin – _ImpactOrigin will give us a wave that moves from the impact location towards the center of the model.
Our origin definition now needs a significant change. We’re going to take the basic formula we’re applying to the x component currently, and apply it to whole vectors. The “1.0” we were using as the start of our wave can now be represented by _ImpactOrigin. _ControlTime * _ImpactSpeed can stay largely the same, except they’re just scalars, so to bring them into 3D space and to give them a direction, multiply them by our direction vector. We also replaced the “-” in the formula with a “+” as the direction information is now included inside of direction. This gives us this final formula.
float4 origin = _ImpactOrigin + _ControlTime * _ImpactSpeed * direction;
There’s one more step of intermediary work we need to get to. Currently our _ImpactOrigin and direction vectors are in world space, for the next section we’re going to need those variables in object space, so let’s convert them.
float4 l_ImpactOrigin = mul(unity_WorldToObject, _ImpactOrigin);

float4 l_direction = mul(unity_WorldToObject, direction);
Just like we used unity_ObjectToWorld earlier to bring our vertex position into worldspace, we’re now doing the opposite and using unity_WorldToObject to bring our world position coordinates into model space.
At the beginning of this section I mentioned “trigonometry magic.” Our vertex modification statement currently looks like this.
v.vertex.xyz += v.normal * sin(v.vertex.x * _Frequency + _ControlTime) * _Amplitude * (1 / dist);
Notice the v.vertex.x part of the formula? This all works great as long as we only want our waves to move along that x axis. To free of ourselves of that, we need a value that represents the axis our wave is traveling along from impact point to model origin. We’ll call that axis value impactAxis. It’s value is equal to the following formula.
float impactAxis = l_ImpactOrigin + dot((v.vertex - l_ImpactOrigin), l_direction);
Trigonometry Magic
Explaining what’s going on with this formula is unfortunately way outside the scope of this article. Nor would I be able to explain it in a satisfactory manner if it were. But if you are intensely curious, the formula was adapted from this StackOverflow answer. With P represented by v.vertex, D represented by l_direction, and A represented by l_ImpactOrigin.
Now that we have this impact axis, we no longer need to rely on v.vertex.x inside our vertex modification function. So let’s replace it with our new impactAxis.
v.vertex.xyz += v.normal * sin(impactAxis * _Frequency + _ControlTime) * _Amplitude * (1 / dist);
At this stage you should be able to fire up Unity and test out the app. Click anywhere on the sphere and a new wave should appear from that location.
Invisible Sphere
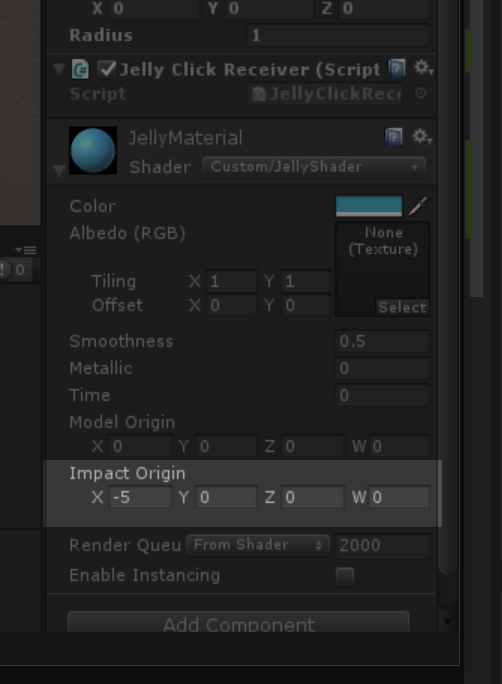
If when you first fire up the app your sphere has vanished, click where the sphere should be and it should reappear. This just means your _ImpactOrigin is starting at (0,0,0,0). To fix this, select the sphere inside the Unity editor, expand the JellyMaterial component near the bottom of the Inspector, and change the Impact Origin to be (-5,0,0,0).
The final code for your shader should look like this.
Shader "Custom/JellyShader" {

Properties {

_Color ("Color", Color) = (1,1,1,1)

_MainTex ("Albedo (RGB)", 2D) = "white" {}

_Glossiness ("Smoothness", Range(0,1)) = 0.5

_Metallic ("Metallic", Range(0,1)) = 0.0
_ControlTime ("Time", float) = 0

_ModelOrigin("Model Origin", Vector) = (0,0,0,0)

_ImpactOrigin("Impact Origin", Vector) = (-5,0,0,0)

}
SubShader {

Tags { "RenderType"="Opaque" }

LOD 200
CGPROGRAM

// Physically based Standard lighting model, and enable shadows on all light types

#pragma surface surf Standard fullforwardshadows addshadow vertex:vert
// Use shader model 3.0 target, to get nicer looking lighting

#pragma target 5.0
sampler2D _MainTex;
struct Input {

float2 uv_MainTex;

};
half _Glossiness;

half _Metallic;

fixed4 _Color;
float _ControlTime;

float4 _ModelOrigin;

float4 _ImpactOrigin;
static half _Frequency = 10; //Base frequency for our waves.

static half _Amplitude = 0.1; //Base amplitude for our waves.

static half _WaveFalloff = 4; //How quickly our distortion should fall off given distance.

static half _MaxWaveDistortion = 1; //Smaller number here will lead to larger distortion as the vertex approaches origin.

static half _ImpactSpeed = 0.2; //How quickly our wave origin moves across the sphere.
// Add instancing support for this shader. You need to check 'Enable Instancing' on materials that use the shader.

// See https://docs.unity3d.com/Manual/GPUInstancing.html for more information about instancing.

// #pragma instancing_options assumeuniformscaling

UNITY_INSTANCING_CBUFFER_START(Props)

// put more per-instance properties here

UNITY_INSTANCING_CBUFFER_END
void vert (inout appdata_base v) {

float4 world_space_vertex = mul(unity_ObjectToWorld, v.vertex);
float4 direction = normalize(_ModelOrigin - _ImpactOrigin);

float4 origin = _ImpactOrigin + _ControlTime * _ImpactSpeed * direction;
//Get the distance in world space from our vertex to the wave origin.

float dist = distance(world_space_vertex, origin);
//Adjust our distance to be non-linear.

dist = pow(dist, _WaveFalloff);
//Set the max amount a wave can be distorted based on distance.

dist = max(dist, _MaxWaveDistortion);
//Convert direction and _ImpactOrigin to model space for later trig magic.

float4 l_ImpactOrigin = mul(unity_WorldToObject, _ImpactOrigin);

float4 l_direction = mul(unity_WorldToObject, direction);
//Magic

float impactAxis = l_ImpactOrigin + dot((v.vertex - l_ImpactOrigin), l_direction);
v.vertex.xyz += v.normal * sin(impactAxis * _Frequency + _ControlTime) * _Amplitude * (1 / dist);

}
void surf (Input IN, inout SurfaceOutputStandard o) {

// Albedo comes from a texture tinted by color

fixed4 c = tex2D (_MainTex, IN.uv_MainTex) * _Color;

o.Albedo = c.rgb;

// Metallic and smoothness come from slider variables

o.Metallic = _Metallic;

o.Smoothness = _Glossiness;

o.Alpha = c.a;

}

ENDCG

}

FallBack "Diffuse"

}

