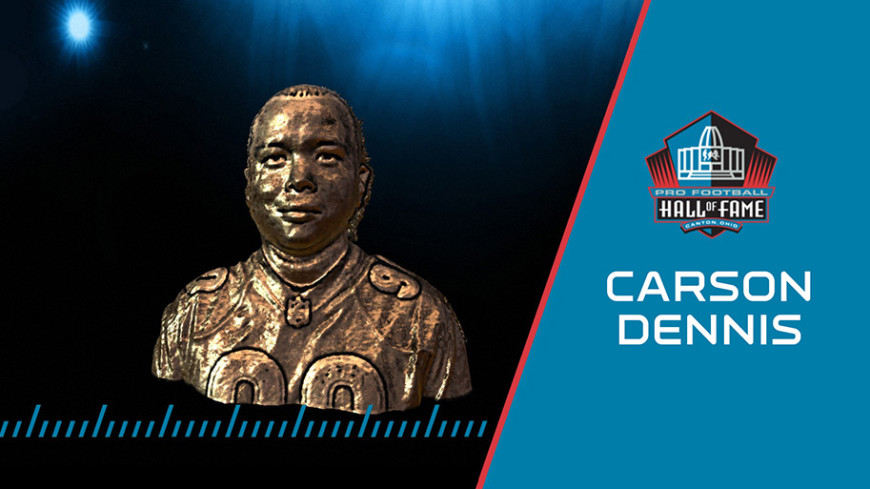
We wanted to create an experience for Super Bowl 50 that brought fans into the Hall of Fame. We decided to create a virtual sculpture of fans’ faces that they could take away as a picture. We knew we’d have to create a great picture while keeping the overall process quick and foolproof, balancing the quality of the scan with the processing time needed to create 3D models of thousands of attendees. To top it off, we needed to integrate a Microsoft Surface Pro, the official tablet of the NFL. We had 8 weeks from kickoff to launch to make it all happen!
2016 NFL Draft HOF Bust from Helios Interactive on Vimeo.
The Discovery Phase
Our first order of business was to choose the 3D scanning hardware. Photogrammetry systems were attractive but too expensive for our budget, with extensive setup and processing times, so we focused on 3D scanners. There are some great products built for the industrial & reverse-engineering markets, but again – too expensive, and it was an unknown whether we could integrate them into our own software. So our pool was narrowed to consumer-level infrared light-based 3D scanners. The best candidates we found were the Structure Sensor, the Realsense R200 and F200 cameras, and the Microsoft Kinect 2.
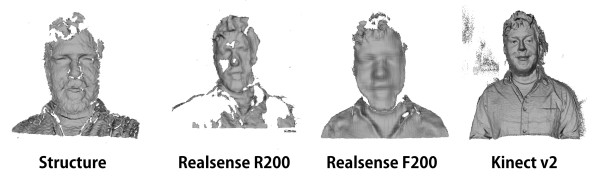
Early tests on different platforms for scanning.
Above you can see a simple test we ran on these four cameras. The test was to sit as close as possible for maximum fidelity, capture depth data for 5 seconds, and create a mesh from the result. We used ReconstructMe to work with the Structure and Realsense cameras, and Kinect Fusion to work with the Kinect 2. In all fairness, this is not the best way to use these cameras, and all of the cameras we tested can take excellent 3D head scans. However, we were limited in some specific ways:
- We could not ask the user to move in order to get data from the sides + back of their head
- We had to get the data as quickly as possible
With these limitations, the Kinect 2 provides the best data for us. It does have an issue with bounced light creating noise, which you can see around the scan above. We take care of this by placing a matte black photo backdrop just behind the user to limit the infrared light bouncing off the room and appearing around the user. Our next step was to control and visualize the 3D scan process from within Unity. We wrapped the Kinect Fusion libraries in a managed DLL that Unity can call to set the parameters of a scan and control start, stop and reset. The DLL gives us a live-updated texture of the scan process so we can see what’s happening along the way.
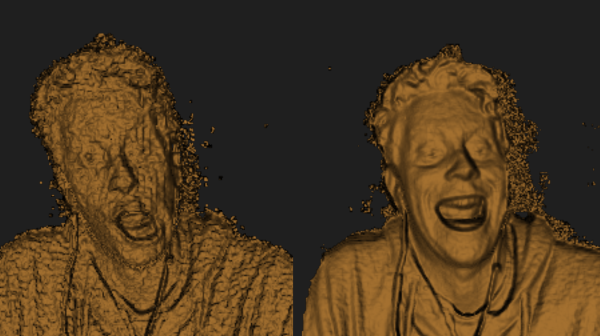
The mesh getting captured with kinect fusion inside unity as a dll
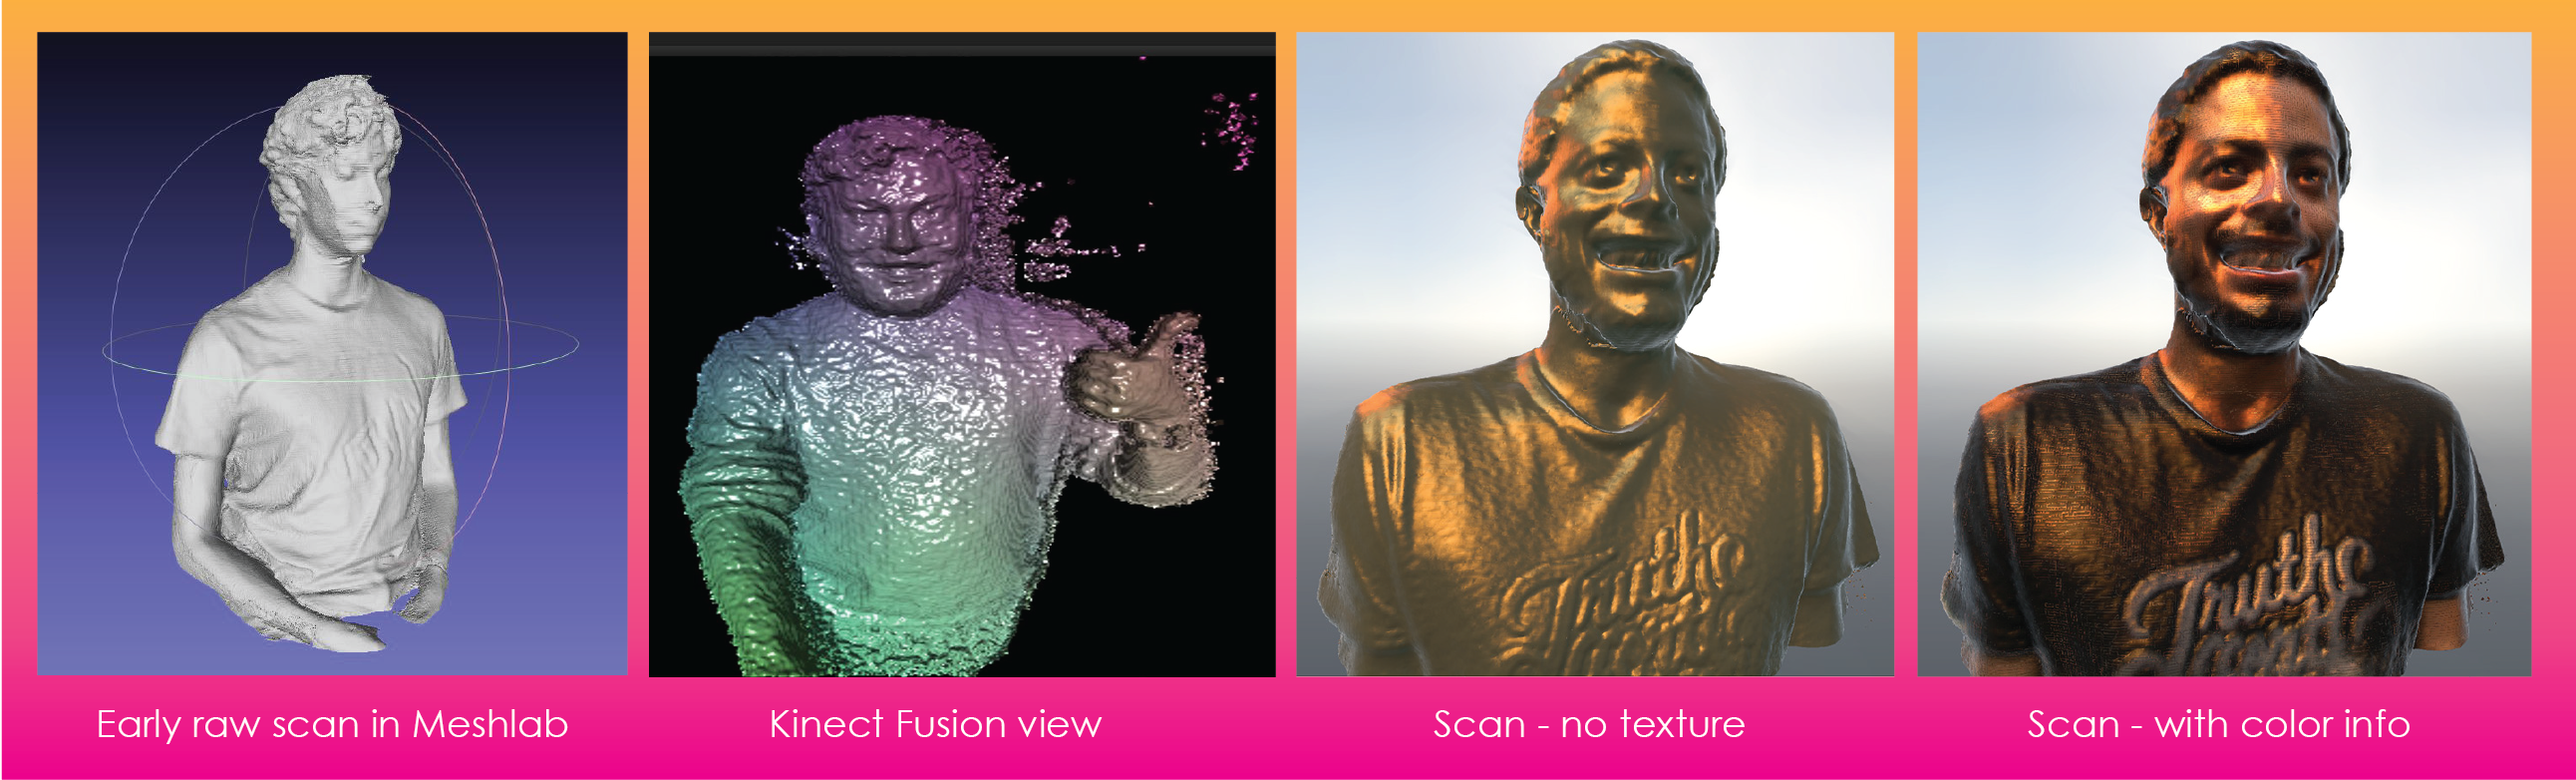
The next part of our discovery process was to prepare the mesh that Kinect Fusion creates for importing into our Unity scene. The outputted mesh is very detailed, very big (up to 2GB), and somewhat messy and noisy. We found that MeshLab gave us a deep suite of tools for cleaning, smoothing and repairing our meshes. They offer a command-line version which we could call from Unity, enabling us to integrate it into our workflow without wrapping or embedding it.
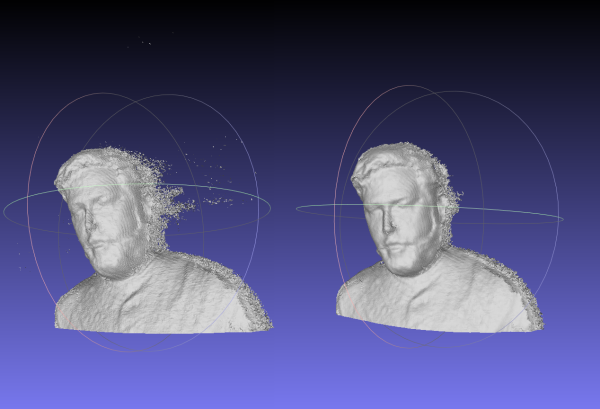
Before and after running a script to decimate, smooth, and reposition the mesh.
The final part of discovery was to finalize our hardware choices. With our software solutions decided upon, we ran tests on a Core i7 Surface Pro 3 to see how it fared. While it’s impressive that it could run our software chain – capturing 3D data at a resolution of 512 voxels per meter and a scan volume of 16.7 million voxels — we found that the processing time needed to fuse the point cloud into a mesh and run it through Meshlab was more than we’d like, hovering around a minute for some scans. For comparison, our desktop machine (Core i7, NVidia GTX 970) could get to the same result in 10-15 seconds. In order to optimize the experience and keep users flowing through, we opted for the desktop. The Surface Pro makes an excellent input device, so we put it to use gathering registration info for the user, and controlling start/stop of the scan from its handheld interface.
The Final Flow
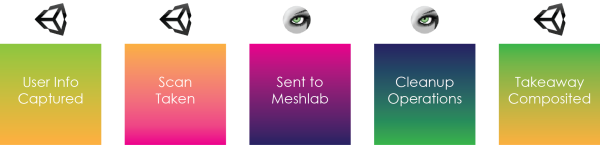
Overview of application flow
With our final hardware and software decided upon, development kicked into high gear, integrating and streamlining the process. We use a single Unity application running on our gaming desktop — it spans two monitors — one on the wall in the room, and the other on the Surface Pro, using remote desktop software to control and display the application.
- The users all get registration codes when they enter the event, so we start by inputting this code, which fetches their name and email address so we can send them their picture once we’re done.
- Then we sit the user in front of the Kinect and press a button in the Unity app to capture 3 seconds worth of depth data.
- This is saved to a mesh and written to disk as an OBJ file.
- We then send a command to Meshlab to load the file, run a series of commands to clean, smooth and simplify the mesh, and then save it back to disk.
- Then Unity imports it into a scene, applies our custom Bronze material, and takes a picture.
- Finally, this picture is sent off to their email address so they can share it with their friends. The whole process takes about 1 minute and 15 seconds from the user walking in to them walking out.
The Process
Fabrication: We decided to create the enclosure for the Kinect and Surface Pro in house to turn them into a unified object. The original case was designed so it could be held by a brand ambassador while scanning users – they could move it around the user and capture the front, sides, and top of their head. It featured an acrylic laser cut case with a back plate that could contain branding and 3D printed grips. However, after thorough testing in our lab we found that we got our best results by keeping the Kinect stationary.
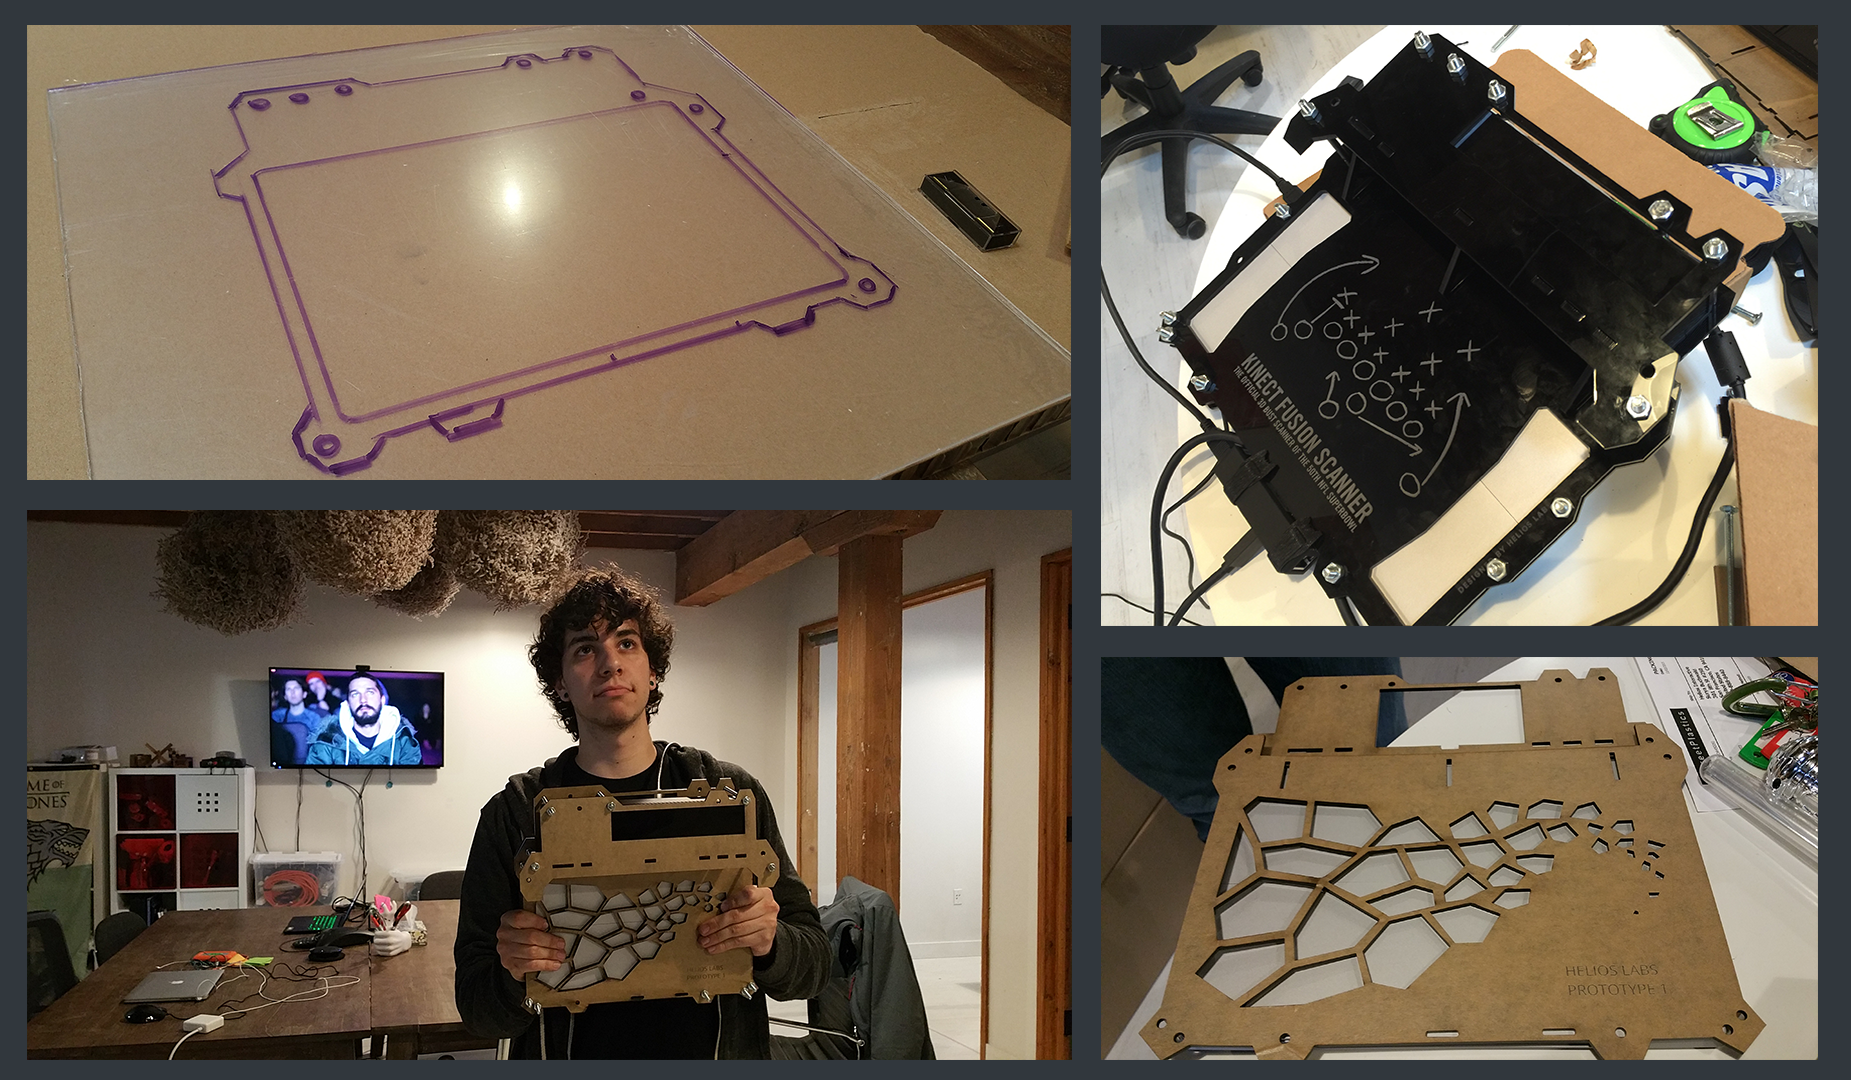
We created a mount for the case so it could be attached to a 1/4″ stud on a monopod mounted to a cabinet which would contain a desktop computer used to handle the brunt of the processing. The Surface Pro was used instead as a high quality touch monitor for the controls the BA’s would use.
PodiumSpinHD from Devin Thompson on Vimeo.
The Output
Early tests
Super Bowl 50
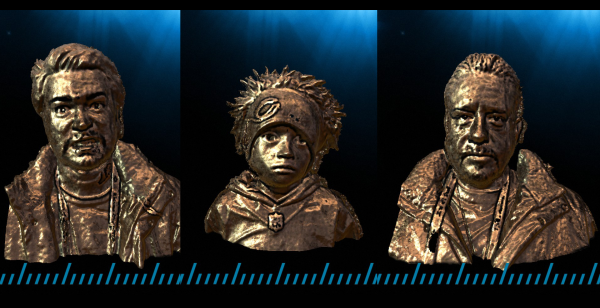
NFL Draft 2016
Improving the output
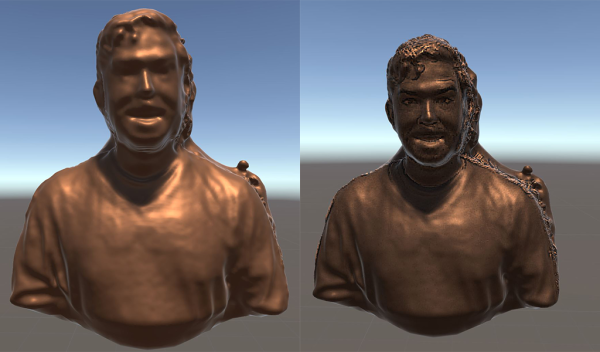
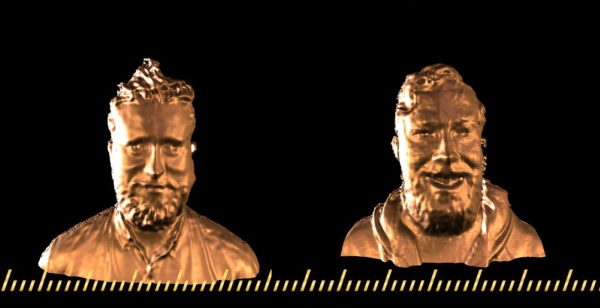
Scan from Super Bowl vs. the NFL Draft version. Right image is earlier version of highpass texture and bronze material, before we were directly controlled lighting.
Our first deployment at SuperBowl 50 used just the depth data from the Kinect to create the digital bust. This resulted in fun scans that captured the surface details of attendee’s appearances but it lacked detail in some cases.
In our second deployment of this system for the NFL Draft, we integrated the color texture of the users and created a new, more complex material using Substance Designer, which gave us more control and flexibility with how the look of the final render. We also changed from exporting an OBJ to a PLY so it would be easier to generate UV’s inside MeshLab and export texture information. Using the UVs and texture, it was then possible to create procedural normal, specular, roughness and metallic maps to really bring out the detail in the scan. We also created a Substance specifically to take in the texture and run some contrast, levels, and highpass operations to get the shadow and highlight information from the actual lighting in the room we were using to scan. This process yielded incredibly improved results.
The scans were also improved with greater light control. During our deploument at the Super Bowl, we were not able to control the lighting conditions due to a skylight over the area which flooded our scanning areas with natural Infrared light. For the deployment at the Draft, we had a completely enclosed photobooth where we could control all aspects of light to ensure the highest possible quality of scan. The results speak for themselves, we had 1,371 virtual hall of fame busts generated on-site over 3 days at the NFL Draft!
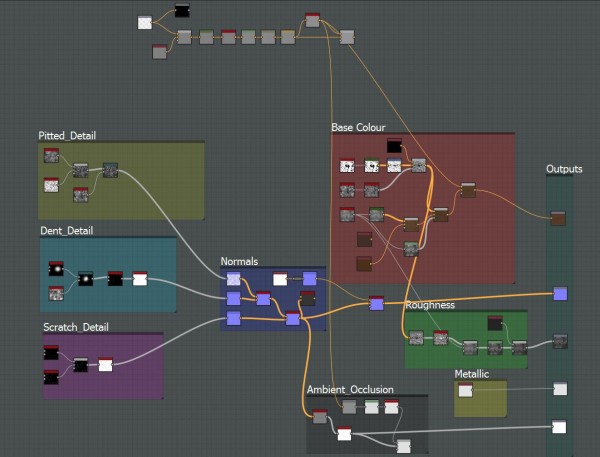
Node graph of the bronze material with the highpass image input parameter
The Future
We’ve got more ideas on how to spice up this idea in the future – a turntable that spins the user to get a 360 of their head and shoulders, an animated GIF output, full-body scans, and on-demand 3D prints!